Saturday, February 17, 2018

Egg Painting Bunny with Video

Hi Everyone, Sherry here and I'm a guest designer for CottageCutz and am over the moon excited about it. I hope that you like the project that I made and enjoy the video. I will link all of the dies that I used at the end of my post.


Remember to practice your CPR - Craft Pray Repeat. Thanks for visiting me today and happy crafting.
God Bless,
Sherry

Friday, February 16, 2018

Spring Fox

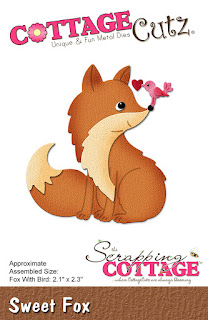
Good morning Cottage Cutz fans!  It's Jeanne today with a bit of spring!  I love the Stitched Flowers dies and wanted to showcase them. (And they're on sale for a limited time!)  What better way than with this sweet fox.
I had an idea for my palette of colors but nothing specific.  So I started by using the Stitched Flowers die and cutting them in multiple colors. (I now have a lot extra for additional cards! So easy!)
Then I played with the colors and arrangements and eventually decided on these flowers in the blue family.  The fox is cut from Cajun Craze cardstock with his chest and tail tip in Very Vanilla.
I cut a piece of white cardstock to 8 1/2 x 5 1/2 and scored it at 4 1/4 for a top fold A2 card.  I cut 5 1/2 x 4 1/4  panel for the front that I embossed with a striped embossing folder.  And my last panel was cut with the largest of the Double Stitched Rectangle dies.
I assembled the fox and colored his eye and nose with a black multi-liner pen. Then I took the stitched panel and arranged the flowers.
Finally, I used foam dots to adhere the fox between the flowers and foam tape to pop the stitched panel up off the card face.

I just love the new Stitched dies!  They really add a special detail to the images.  The Stitched dies and the new Spring dies are all on sale for a limited time.  Make sure to check them out!

Dies used:
http://www.scrappingcottage.com/cottagecutzstitchedflowers.aspx

http://www.scrappingcottage.com/cottagecutzsweetfox.aspx
http://www.scrappingcottage.com/cottagecutzdouble-stitchedrectanglesetbasics.aspx

Thanks for stopping by today and I hope you have a creative weekend!


Thursday, February 15, 2018

Easter Peeps!

Good Morning Scrapping Cottage Family!

Cottage Cutz has a brand new release of two collections of dies.  They are In Stitches and Spring Designs in all there are 33 new dies.  And for a limited time the new dies are 25% off!
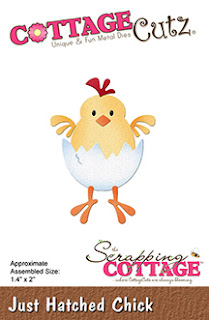
Today, I am really excited to be sharing one of our brand new Easter dies!  This little chick is just adorable!


Design steps:

 1.  Using the Just Hatched Chick die cut the chick bodies and wings out of yellow card stock.  Cut the eggs out of white, cut the feet using orange and the little head feather out of red
2.  Use TH ink and add some shadowing to the different pieces
3.  Assemble the chicks and add tiny rhinestones for the eyes
4.  Cut the word Easter using the Stitched Alphabet dies
 5.  Using the Pierced Wide Rectangle Frame die cut out a white frame.  Use an A2 white card base, cut a yellow chevron piece of DP slightly smaller than the white card base.  Cut a piece of kraft card stock 4 1/2 x 3 1/2 and run through an embossing folder
6.  Assemble the card as shown
Cottage Cutz Products


Please make sure that you check out all of the new release dies! They are amazing!!

Blessings


Pam

Wednesday, February 14, 2018

Fresh Spring Floral Gratitude

Hello and Happy Valentine's Day! It's Janet here with another video tutorial. This time I'm showing off one of the largest dies in the new Spring 2018 Release called Fresh Spring Floral. Others on the DT have featured this gorgeous floral die but this is my twist on it.
My thank you card includes the Expressions Plus Grateful die at the bottom. Inside, I used the Thanks Expressions die. All three dies are available in the store.

This is a pretty simple A2 card base in black card stock. The black background makes the pastel colors in the wreath pop. The white frame was created with an embossing pen and white embossing powder. The raised glossy frame gives it an almost nostalgic look, like the old fashioned photo albums with white writing. The Grateful Expressions Plus sentiment is cut from textured red foil card stock to add a little glamour without competing with the wreath.

I hope you'll take a few minutes to watch the card construction tutorial. As always, just click on the YouTube thumbnail below. If you have trouble using the thumbnail, you can also follow this link directly: Fresh Floral Gratitude Video Tutorial


That's it from me today. Thanks for visiting us!

- Janet

Dies Used In This Project:


Monday, February 12, 2018

Let's Color Eggs!

Hi, Lois here with another card for Easter.  As a kid, I'm sure we all loved to color Easter eggs.  I know I did.  Using one of the new Easter/spring dies from CottageCutz, I made a card reminiscent of that fun experience.  The CottageCutz die I used on my card is Egg Painting Bunny.


I wanted to make my egg-painting bunny the star of the show, so I made a relatively monochromatic background for him, using various purple papers.

To start my card, I die-cut the pieces from white cardstock.


Leaving the pieces on my sticky foam mat, I colored them using my favorite coloring medium -- my Copic markers -- using the packaging as a guide.   After I colored the pieces, I constructed the bunny and his paint can.


I then cut my cardstock and patterned paper:

Purple card base - 8 1/2" x 5 1/2"
Pale violet patterned paper - 4" x 5 1/4"
Die cut purple cardstock with largest Nested Stitched Scallop Rectangle Die
Die cut pale violet cardstock with largest Nested Stitched Scallop Rectangle Die, trimmed at the stitch lines


Constructing my card was simple.


I added some small foam pop dots to the back of the bunny and the eggs and adhered them to my card.


I then stamped the sentiment, and I was finished.


Be sure to check out the CottageCutz store because these Easter/spring dies (as well as some cute stitched dies) are currently 25% off.

CottageCutz dies used on my card are:

http://www.scrappingcottage.com/cottagecutzeggpaintingbunny.aspx


http://www.scrappingcottage.com/cottagecutznestedstitchedscalloprectangleset.aspx


Sunday, February 11, 2018

Crazy In Love


Hi everyone!

This is Anja again. Valentine's day is in a few days. I have one more Valentine's card for you today, before I move on Easter and Spring themed cards. This time I used another holiday die. I like dies that can be used on different occasions. This car die is definitely one of those.


For this card I used:
- Cottage Cutz dies (Holiday Car, Phrase Love),
- Distress Inks (Black Soot, Fired Brick),
- craft paper for card base (two 15x15 cm squares),
- red, black and white card stock for die cuts,
- Versafine Onyx black ink pad,
- Versamark embossing ink pad,
- clear embossing powder,
- alphabet stamps,
- background stencil,
- silver pigment ink,
- white pigment ink,
- hole punch,
- split pin,
- blue and yellow brush pen,
- scissors,
- Glossy accents,
- heat gun,
- paper glue.

First I cut and colored the car. This time I used colored card stock and just added a bit of Distress Ink around the edges. I used silver pigment ink for metal parts of the car. I colored the headlights with brush pens.


I cut two rectangles from craft card stock and colored them, using stencil and white and red ink.


First I used white pigment ink and then added the red. I colored the inside i the same way.


Then I stamped the sentiment, using alphabet stamps and black ink.


I decided to distress the edge of the paper. I used the scissors to do it.


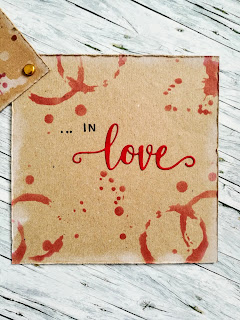
Afterward I decided I wanted the glass marks to look more realistic. That's why I used embossing ink and powder to make them look "wet". I did this only on the front side of the card.


I made holes on the both squares and put in a split pin for the card to slide.


Then I just glued the car and the love phrase on the front and in the inside of the card. I used Glossy Accents for the windows and the lights of the car.


This all from me for today. Have a nice Sunday and don't forget to check the store for the latest dies.

Anja Z.

I used: