Sunday, June 18, 2017

Celebrate with Sunflowers

Hi!

It's Anja here with you on this beautiful Sunday. 

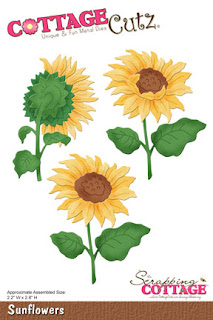
As long as I can remember sunflowers have been my favourite flowers. I love their bright colors and I often give them to others on their birthdays or other special occasions. And sunflowers made of paper can also be a beautiful gift. So I couldn't resist getting this gorgeous Cottage Cutz die and making a bunch of sunflowers. This is  my finished card.


I used:
- Cottage Cutz dies (Sunflowers, Celebrate Phrase, Pierced Circle Set, Picket Fence Border),
- Distress Oxides (Fossilized Amber, Spiced Marmalade, Peeled Paint, Vintage Photo, Walnut Stain, Iced Spruce),
- white card base (15 x 15 cm),
- Nuvo Crystal Drops (Dandelion Yellow),
- Wood veneer,
- Wink of Stella glitter brush pen,
- white card stock for die cuts,
- double sided adhesive tape,
- paper glue.

First I die cut the sunflowers and other parts for the card. I used Distress Oxides to color them.


Then I cut two squares (13x13 cm) from wood veneer. I have this roll that looks like wood on one side and has fabric on the other. It is not so easy to cut and I was struggling to make even edges. But I love the color and real wooden look of it. I adhere it with wide double sided adhesive tape.


Then I glued on all the sunflowers and added some enamel dots. I finished the phrase with some glitter using Wink of Stella brush. 


And this is how I decorated it inside.


I glued the fence only on the sides so it can be used as a gift holder.


Thank you for stopping by.
Anja Z.


Saturday, June 17, 2017

~ Awesome Dad ~

Hello Scrapping Cottage friends! Thanks for taking the time to stop and visit today. It's Mary Marsh here bringing you the Saturday edition of the Blog.

Hope you have been enjoying all the different cards from the DT using the new Expressions Plus word dies. The team has shown some really creative ways to use these dies with your existing collection. With 35 word phrases in these dies, there is so much you can do with them in your own card making.

Combining the word die phrases with a stamped sentiment is just one idea. That's the direction I am going with my card today. I wanted to use the Awesome Phrase die and started thinking of how I could incorporate that into a Father's Day card.

I wanted the card to reflect Dad as extraordinary & impressive and also to have an image that reflected that as well. I came up with a dinosaur image. They were grand and striking animals. So my card idea was born. Maybe I think to much (LOL), but it helps me to create when I have a theme in mind.

So let's get started with some details on my card for this week.

Step 1: Once my card theme was set, I needed a layout for my card. I saw the  Splitcoaststampers Sketch #649 and thought it would work perfectly. When I look at a sketch I guesstimate the layer sizes. I usually start with an A2 base then go form there. It looked to me as though layer #2 had a 1/4" border on this layout. Once I figured that size, the other panel sizes became a bit easier.
.
Burgundy Card Base: 5 1/2" x 4 1/4"
Striped Patterned Paper (layer #2): 4 7/8" x 3 5/8"
Lime rectangle Panel: (layer #4) 4 7/8" x 1 3/4"
Navy Blue Rectangle Panel (layer #5) 4 7/8" x 1 5/8"
Sentiment Circle: (layer #6): circle dies -3rd largest

Step 2: I looked through my patterned paper and cardstock for my colors. I thought this striped paper had a nice masculine appeal, and I could also use it for layer #3 in the sketch. The striped paper has burgundy, navy blue. lime green, emerald green and peach. I cut the papers to the above sizes and die cut my circles. Navy blue is a hard color for me to photograph for some reason. It looks black in this photo.
Step 3: I die cut my dinosaur and my word phrase. I wasn't sure at first what color to make the awesome word or the dinosaur. So I cut several staying with the card colors. But in the end, the dino ending up lime green and a darker contrast green. His bony spine is cut in peach also one of the colors in the striped paper. The awesome phrase look best in the burgundy color.
Step 4: Next I stamped my sentiment. I just wanted the Dad portion of the stamp for my circle. So I taped off all the words except Dad and inked up that part of the stamp. I used my MISTI just in case  I needed to stamp the sentiment more than one time. And, as it turned out the image did stamp dark enough the first time so had to re-stamp. If you look at my finished card you will see the difference a second stamping made.


Step 5: Now that all the dies are cut and sentiment stamped, it 's time for card assembly. I added a couple peach enamel dots and a peach heart to complete my Father's Day card. I hope I have given you some inspiration on ways to use these new Phrase Word dies with your stamps to create a card.

That's it for me for this post. See you next week.

Dies I used to create card:
http://www.scrappingcottage.com/cottagecutzbabydino-stegosaurus.aspx
 
http://www.scrappingcottage.com/cottagecutzexpressionsplusawesomephrase.aspx


Friday, June 16, 2017

A Set Of Note Cards

Hello
This is Anita here . Special occasions are an important part of our life and I like to give card or any handmade things to the person .
So I make many small note cards before hand and use them as and when the occasion arises .
CottageCutz has recently released some beautiful phrase dies that are so versatile, that one can use them for many purpose .
You can check them here

Here are my set of note cards .


CottageCutz dies used


Have a great day and thanks for stopping by .


Thursday, June 15, 2017

Great Outdoors

Good Morning My Scrapping Cottage Friends!

It is Pam sharing with you on this beautiful Thursday! I am showing you a Dad's Day card that has 4 folds.  It should really appeal to all those dad's that love to go camping and appreciate the beauty that our great outdoors has to offer!


1.  Start with a  5 1/2 x 12 inch piece of brown card stock.  Score at 1 1/2, 2 3/4, 5 1/4 and 7 3/4
next cut your designer paper slightly smaller than the score lines for each panel.
2.  Glue the designer paper to the card as shown below
3.  Using Cottage Cutz dies Rustic Sign and TreesWoodland Fawns and Spring Grass cut out the sign, grass, fawn and bunny. Assemble the pieces and ink for dimension

4.  On the back panel cut a free hand rolling hill for the backdrop glue it down first add the trees, fawn and grass
5.  On the third panel from the front cut a free hand rolling hill and glue down first add the tree, the bunny and the grass
6.  On the very front panel add a free hand cut hill and the sign and finally the grass
7.  Type up your sentiment and print on cream colored paper add Dad to the sign and your sentiment to the forth panel

Cottage Cutz Products


I hope you give your dad a big hug and make him a very cute Father's Day card!

Blessings
Pam