Showing posts with label cottagecutz stitched square set. Show all posts

Saturday, November 13, 2021

Santa Gnome in Present

Hello CottageCutz friends! Thanks for taking the time to stop and visit with us today. It's Mary Marsh here bringing you the Saturday edition of the Blog.

IT'S NEW RELEASE TIME! The new Christmas dies are in the online store with 40 new designs from Christmas Part 1 and 19 new designs from Christmas Part 2 and they are on a limited time sale at 30% off.

I send a lot of Christmas cards and during the busy holiday season, I need to make a few cards that are more simplified in design and can be reproduced quickly. This allows me to spend time on more detailed designs. 

Today for your viewing pleasure, I have a design featuring the whimsical Santa Gnome in Present die from the Christmas Part 2 collection. We have so many cute gnomes in the collection this year. Here is a card I made using another one of them. 

 So let's get started with some details on how I created this card.

Design Steps:

I started my card this week with the layout. As I have said so many times before having the sketch in mind helps start as well as simplify the card making process for me. I liked the sketch #869 at Splitcoaststampers. I thought it would work well for this cheeky little gnome. 
Then I also used the colors from the Splitcoaststampers color challenge #869. We were to use cherry cobbler, gold and shaded spruce. Perfect colors for the Christmas gnome. 
cherry cobbler, gold, shaded spruce


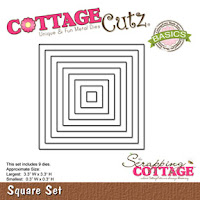
I had the perfect designer paper that had all the challenge colors. My card is a 5 1/4" square. For the diamond shape, I used the largest Stitched Square (3.5") die and the circle is the 2nd largest (3 1/4") from the Circle set

cherry cobbler base: 5 1/4" square
gold layer: 5" square
designer paper layer: 4 7/8" square

Next, I cut the Santa Gnome in the challenge colors. I used Art glitter glue to assemble the image. I like this one because it dries clear. 

I stamped my sentiment on an angle in the circle using the shaded spruce ink. I used my MISTI for placement. 

Now that my card elements are prepared, I am ready to start card assembly. I used double sided tape to attach the panels. The Gnome is attached with dimensional adhesive. I also changed the Christmas ornament, I decided to cut it from the designer paper to give a bit more contrast against the green present box. 
To finish off my card, I attached the panel to the cherry cobbler card base and also scattered a few gold sequins. That's my card sample for this week. I hope I have given you an idea for a way to use the Santa Gnome in present die. See you next Saturday!

Reminder: The CottageCutz You Tube channel is up and running again. We have new videos every Wednesday. Plus there is a giveaway on the channel. Details on the channel. Check it out here.

dies I used to create card:


Tuesday, July 11, 2017

Elegant Wedding Card


Hello friends. It's Janet from SugarShine Designs. I hope you are having a great week! It's the middle of the summer wedding season so I thought I'd make a wedding card using some beautiful CottageCutz dies you can find in the store. Click below for the video tutorial showing how this comes together.


This is a 5" square card that features the Bride & Groom die on the front in holographic white card stock. I just love this simple but beautiful lacy die that is so smart, it cuts out the groom's bow tie so it can stand out. Very elegant! The couple is attached to a 4.75" square black embossed card stock that is lifted off of the card base with a 4.5" square of fun foam. This is a great way to get a little lift but not make it so thick that it can't be mailed. Across the couple, I placed another die called Tweet Love. It includes the Love sentiment and also two "tweet" little birds. I thought the birds were too big for my design but they are cute! I saved them to decorate the envelope. As a substitute, you could choose the new Love Expressions die or give it a slightly different twist by picking Celebrate, Adore, Dream, Cherish, etc. The pretty script in those dies would match the elegant feel of this card perfectly. To finish the front, I used three metallic flower sequins and white gems.


Inside I used the largest square from the Stitched Square set and added the lacy Balloon Bouquet die in the same white holographic paper as the Bride & Groom on the front. The balloon die is super versatile. It would work for any elegant celebration from birthdays, parties, weddings and anniversaries.


Thanks for joining me today. I'll see you soon with another video tutorial!
Janet

Dies used in this project:


Wednesday, June 21, 2017

Let's Go Fishing! Double-Fold Card


Hello Scrapping Cottage friends! It's Janet from SugarShine Designs with a masculine card for you today. This card is called a double-fold card and is also known as a Joy card fold. By complete coincidence, Lois posted this same card fold on Monday except she turned it so that the card opened up vertically. My card opens up horizontally but is otherwise very similar. This is a nice fold because it starts out a normal A2 size but once opened expands to three panels and 10.25" wide.


I used many different die sets to create this project but if you don't have all of them, just substitute with different dies. This same idea can work on a number of different themes. Just start by thinking about what you want to use for the closure and then go from there.

In my case, I started with the tree from the Grass, Trees & Vines set and built the rest around the outdoors theme. I also used all the dies from the stamp and die set called Woodlands. The detail in these stamps and dies are awesome. You can color these any number of ways but I chose to use my PrismaColor pencils. I colored the dies from the Fishing Gear set with distressed ink. 

For complete instructions and dimensions, please visit the CottageCutz YouTube Channel by clicking on the video image below. As always, ask any questions you have and give me a thumbs up if you enjoy the video. If you haven't already, please subscribe so that you won't miss any future CottageCutz videos. We are very close to 500 subscribers! Thank you for supporting the channel. We appreciate every one of our CottageCutz fans across all of our social media platforms.

 Click here for video

Dies Used in This Card:


Thanks for spending some time today with me and the Scrapping Cottage. See you again soon!

- Janet
SugarShine Designs

Thursday, December 22, 2016

CAS CARD WITH COTTAGECUTZ DIES


Hello

It's Anita here . It is the most super busy time of the year and we all are doing innumerable tasks all at the same time. With so much workload, it becomes very difficult to make heavy cards and projects.
So  I have a very simple and elegant card for you that can be made very quickly.

Do have a look here.


This is a card with an embossed panel and just three die cuts.


CottageCutz store has a huge supply of dies for all themes. do stop by and browse for the design of your choice.

Saturday, November 19, 2016

Mistletoe Christmas Card

Hello Scrapping Cottage friends! Thanks for taking the time to stop and visit today. It's Mary Marsh here bringing you the Saturday edition of the Blog.

This upcoming week we are celebrating Thanksgiving here in the USA and then comes the frantic Christmas rush (lol)!!! Card making, gift buying and wrapping, baking and decorating will be in the forefront for the month of December.

So if you haven't started your cards as yet, I am showing one today that could very easily be mass produced. You could change it up by simply using a different patterned paper.

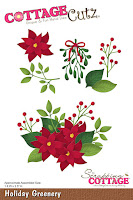
So let's get started on some details of how I created my "Mistletoe Christmas" card. My mistletoe is from the Holiday Greenery die. It was part of the Christmas 2 release.

Green Card Base: 4 1/4" x 5 1/2" (A2 size)
Red Layer: 4 1/8" x 5 3/8"
Patterned Paper Layer: 3 7/8" x 5 1/8"
Image Panel: 2 1/2" x 2 1/2"
Black layering Panel: 2 3/4" x 2 3/4"

Step 1: I started my card this week by choosing my patterned paper. Once I did that, I just matched my cardstock to the colors used on the patterned paper.
Step 2: Cut my first 3 layers of cardstock to the above sizes and assembled using double sided tape. I decided to add some red seam binding just for added card interest.  No bow because I want to keep the card flat for mailing.
 
Step 3: I cut my image panel using the basic square in vanilla and the stitched square in black. There is black in this patterned paper so I used that cardstock to help accent my card. I stamped my sentiment and added some dots cut from the holiday greenery die. I used dimensional tape on this panel to lift it away from the patterned panel.
 
That completes my card for this week. As I said, this one could be mass produced easily. And, that would free you up to do other Christmas tasks. Here is another look at the completed card.
Well Blogger friends, that's it for me fo this week so until next time.......inky hugs.
 
http://www.scrappingcottage.com/search.aspx?find=square+set
http://www.scrappingcottage.com/cottagecutzstitchedsquaresetbasics.aspx
 
http://www.scrappingcottage.com/cottagecutzholidaygreenery.aspx


Wednesday, October 19, 2016

AUTUMN THEME CARD WITH ANITA KEJRIWAL

HELLO,

How is everyone doing ?? Are you all busy with preparations for Christmas or still basking in the beauty of Autumn ??
I am really enjoying myself doing both and believe me !!! It is so much fun creating these cards. CottageCutz has released some awesome Autumn theme dies that you can check here.
Today , I have a card for you where I have used a very innovative way to use negative of die cuts as stencils.
Here is my card .


To create this card, Cut a card A2 size that is 5.5 inches by 4.24 inches in white card stock.
Using the CottageCutz Feathers die, cut out the diecuts and use the negative of the die cuts as stencil to create a background. I have used the Distress inks Rusty Hinge, Spiced Marmalade, Peeled paint and Gathered Twigs.

Cut out a window frame from the CottageCutz Stitched Square die and distress with Espresso Distress ink. 


Cut out the feathers from the CottageCutz feathers die and colour them using the above colours. Tie together using a twine.
Stamp a Thank You sentiment and layer all the square dies together.


Products used from CottageCutz dies.


`

The CottageCutz challenge 7 is Fall Theme. Do share your entries with us. See you soon with more CottageCutz goodness.