Showing posts with label Mermaid. Show all posts

Friday, July 16, 2021

Sea of Love

Happy Friday! It's Jeanne today with a card using one of the fun new slimline dies combined with a few dies from summer of 2020 Pirates and Sea Creatures.  The Waves Slimline coordinates perfectly with that release.

I first cut the fish and mermaid tail from various colors of cardstock.

Next I worked on the ocean.  I cut a 5 1/2 x 9 inch piece of mixed media paper so I could do a watercolor technique I call "splat". 

I swatch Distress Oxide on a craft mat and spray with water.  Then I dip the paper in the ink.

I keep going until I'm satisfied with the results.  I use a heat gun every once in awhile to set the ink.

I used the largest of the Slimline Rectangles to cut a base from white cardstock and stamped the sentiment in the upper left.  I cut the water piece into three strips - two 2 inches and one 1 1/2 inches.

I opted to use only two of the strips and cut them with two of the Waves dies.  I placed them on the bottom and added my mermaid tail.  The over hang on the right, I cut with scissors.

Then I added my fish.  I had made more than I ended up using but that's perfect - I have some fish and a water strip for another card.

To finish the card added a pearl to the shell.  I hope you've enjoyed my card today.  Be sure to visit the online store where the new release is on sale for a limited time.

Products used:


Thanks for visiting today.  I hope you have a fun and creative weekend.


Monday, August 03, 2020

Under The Sea

Hi!

It's Anja here. For today's post I have a mermaid card for you. I made another under the sea scene using this cute new dies.
 

For this card I used:
- Cottage Cutz dies (Mermaid, Tropical Fish),
- Distress Inks and Oxides,
- craft card base (10x21 cm),
- water color paper for background (9,5x20,5 cm),
- white card stock for die cuts,
- heat gun,
- water spritzer,
- black pen,
- white pen,
- Glossy Accents,
- Wink of Stella glitter brush,
- paper glue.

First I cut and colored the mermaid and the fish. I used Distress Oxides for the background. I used a smooching technique for it. I put a mix of blue Distress Oxides shades on my glass matt and mixed it with water. Then I tapped watercolor paper on it to get the result I wanted. I dried the paper with the heat gun. Then I placed all the cuts on it. I used Wink of Stella glitter brush to add some interest to the mermaid's tail and the pearl. I also added drops of Glossy Accents glue to the card to add some air bubbles to the sea. And my card was done.


Thank you for visiting. Have a nice day and see you again on Sunday.

Anja Z.


Cottage Cutz dies I used for this card:


Thursday, July 30, 2020

Jaws!

Hello My Scrapping Cottage Friends

It is Pam on the blog today!

When I lived in South Carolina near the beach there were multiple shark sightings!  Needless to say when that happened the beaches cleared out very quickly!  The card I am sharing today reminds me of those days on the beaches in Hilton Head.  As a matter of fact this is going to one of my friends on the East Coast.

And don't forget to check out this release of dies in the online store.  This selection of dies features Pirates and Sea Creatures! There are 14 awesome designs in the collection and you are going to want each and everyone of them.   And there is more!! There is another brand new set of dies out called Beach and Tropical Release.  Be watching for our team to create some card designs with this awesome collection.

Background Photo by 

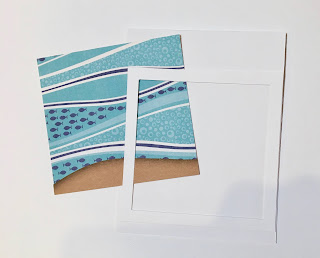
 1.  Cut a piece of white card stock 4 1/8 x 4 1/8 then using the largest Pierced Square die cut a square out of the middle of the 4 1/8 x 4 1/8 piece.  This will create a white frame.  Use a white A2 piece of card stock as the card base.  Cut out a 4 x 4 piece of ocean DP and a 1 x 4 piece of brown card stock cut with a slight hill for the ocean floor
2.  Using the Shark die cut out grey and white card stock.  Use the Mermaid die to cut out the seaweed in two shades of green.  Last use the Paddle and Rope Ladder die to cut out the rope and starfish
3.  Glue the Ocean DP flat to the center of the card front and add the ocean floor.  Place dimension tape to the back of the white frame and attach it around the ocean
4.  Shade all of the die cut pieces and using a fine tip glue applicator assemble the pieces
5.  Glue down the seaweed and add the rope.  Next finish by added additional seaweed, starfish and the shark
6.  I also used some additional tiny fish from the Paddle and Rope Ladder cut.  I cut them in navy and added them above the shark.  Stamp your sentiment and layer onto green and your card is complete

CottageCutz Products


Don't forget to check out the BRAND NEW RELEASE just perfect for those long hot summer days!

Blessings
Pam

Saturday, July 11, 2020

Oceans of Love

Hello Scrapping Cottage friends! Thanks for taking the time to stop and visit with us today. It's Mary Marsh here bringing you the Saturday edition of the Blog.

We have a brand new release of dies in the online store. This one is all about the sea with Pirates and undersea creatures. There are 14 new whimsical designs and each one is cuter than the next. These cards would be ideal for so many occasions. The DT has been sampling these new dies for a variety of occasions. So check back through the Blog if you need some inspiration.

For my card today, I am featuring the new Jellyfish & Octopus dies and I created a whimsical birthday card for a little boy who is turning 6. So let's get started with some details on how I created my card.

Design Steps:
Since I knew I was created a sea themed  card, I started by selecting my designer paper. I have this sea themed collection and this particular piece just looked like wave movement to me. I thought it would work well for an underwater scene.

Mint Macaron Card Base: 4 3/4" x 5 3/4"
Designer Paper Layer: 4 1/2" x 5 1/2"
Next, I cut my jelly fish in mint macaron and sponged his tentacles in the same shade of ink for a color gradient. The octopus is cut from a fig designer paper. I liked the texture it gave the image.
For my sentiment I decided to use a combo of a die cut + a stamped sentiment. The Sending phrase is from an older CottageCutz die- Sending Hugs.  I cut it in a fig cardstock

Now that all my card elements are cut, I am ready to start card assembly. I attached the jelly fish and octopus with dimensional adhesive to lift off the designer paper and give a bit of depth. Stamped the sentiment in a fig ink 3x using my MISTI tool.

 and attached the Sending Phrase with Ranger multi-medium matte.  

I thought I still needed something on the bottom right corner, so I added some sea greens, star fish and another small fish. These are from the Mermaid die. Attached the image panel to the mint card base and my card is complete. 

That's it for me for this post. See you next Saturday! 

dies I used to create card:


Friday, July 10, 2020

Ocean Deep

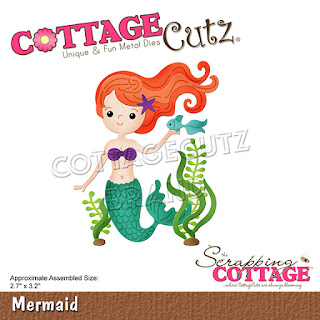
Happy Friday!  It's Jeanne today with a card featuring the adorable mermaid from the new Pirates and Sea Creatures release. I haven't yet decided who I will send this to - it could be used for a birthday, congratulations or encouragement.
I chose the colors of this card from this week's color challenge at CAS Colours & Sketches.  They seemed perfect for a mermaid.
I cut her from white and colored cardstock.  I used Distress Oxide ink to color her skin and shade her hair (cut from Cinnamon Cider cardstock).
Her tail, the fish and starfish are cut from the challenge colors and shaded with the matching inks.
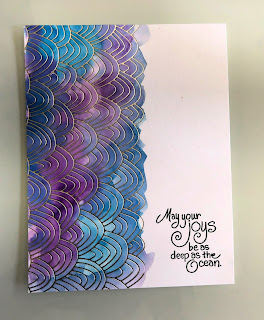
The card base is quite simple.  I cut a panel from Strathmore Mixed Media paper 6 x 5 inches and used a hot foil system to hot foil the "waves" in silver on the panel.
I then used the Pacific Point and Gorgeous Grape in to watercolor the ocean.
When that had dried, I cut the panel down to A2 size and stamped the sentiment in black.
I adhered my mermaid and glued it all to an A2 card base.  A very simple card that is super bright and cute!

Be sure to visit the online store to check out this release - the dies are very fun!

http://www.scrappingcottage.com/cottagecutzmermaid.aspx

Thanks for visiting today!  I hope you have a fun and creative weekend!