Showing posts with label Deer & Forest Border. Show all posts

Tuesday, June 20, 2017

Jolly penguins shaker card

Hi, Janja here!

Nice hot weather inspired me to create a shaker card with a winter scene.


Supplies:
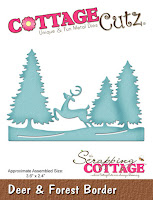
- CottageCutz dies: Jolly Penguin, Deer & Forest Border, Snowman w/ Lamp Post, Circle Set
- white card base: 5.3 x 5.3" (13,5 x 13,5 cm), folded
- white cardstock: 4.72 x 4.72" (12 x 12 cm)
- white cardstock: 4.5 x 4.5" (11,4 x 11,4 cm)
- fun foam: 4,3 x 4,3" (11 x 11 cm)
- white and colored cardstock
- transparent foil: 4,3 x 4,3" (11 x 11 cm)
- Cosmic shimmer glitter jewels - iced snow
- Distress Oxide - Broken China

Usually I use a watercolor paper for coloring, but this time I colored on a white cardstock. I also used it for other cutouts.


While we wait for the color to dry, cut out cute penguins from white and colored cardstock.


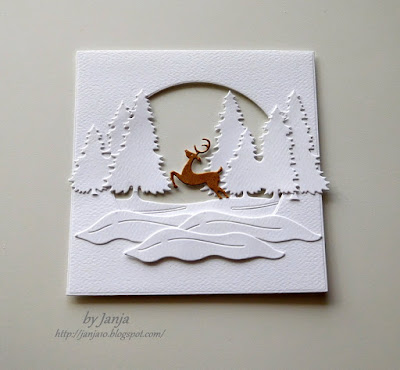
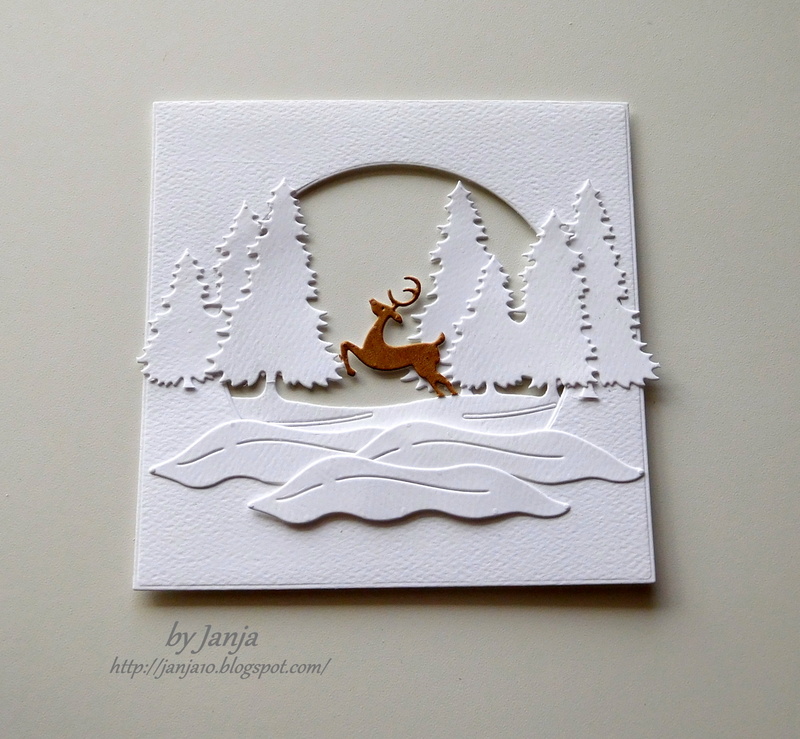
Cut out deer and spruces of white cardstock twice. Use one cut out entirely, and from the other cut off spruces with scissors. Also cut out deer from brown cardstock.
On the bottom edge add a white cardstock.


Borrow three snowy hills from snowman :).


Cut a hole in a white cardstock with an 8th die in a row from the middle of a set. Do the same with fun foam.


We begin by assembling the card as shown.


Fasten a fun foam on to blue background. Add some glitter in to the opening and cover it with a transparent foil.
Now we only have to fix a white cardstock with a deer and penguins.


Completed card.


I hope you like it and thank you for coming over.


Wednesday, December 21, 2016

Santa and His Airplane


Hello Scrapping Cottage friends! Thanks for taking the time to stop and visit today. It's Mary Marsh here bringing you the Wednesday edition of the Blog.

Well we are down to the wire with Christmas now. It's just 4 days until the big day. Children are anxiously awaiting the arrival of Santa Claus. Speaking of Santa, today it's all about Santa with a twist. He is flying an airplane. Maybe his reindeer are on strike this year (lol)!!

My flying Kris Kringle is an older die from CottageCutz. The die is a 4 x 6 and all the plane pieces are arranged separately on the metal plate. This allows you the option of cutting in whatever color you want. I love all the detail on this die.

Here are some details on how I created this card. Not really much explanation needed though. Basically all I did was cut the image pieces in the colors I wanted. You could also cut them in white cardstock and then color with your choice of medium.

Red Card Base: 4 x 1/4" x 5 1/2"
Blue Layering panel: 4 1/8" x 5 3/8"
Embossed Image Panel: 4" x 5 1/2"

My image panel is patterned paper that is already embossed and all you have to do is add your color. The embossed area will resist the ink. I thought this background looked like snow falling. I sponged a light blue ink on the background.

Here is another way to create a snowy background with sponging and a brayer. Then the use of a stencil creates the falling snow.


To add a little background interest to my scene I cut pine trees using the deer & forest border die. I cut a slope in white cardstock and added some chunky glitter. For my sentiment I used the Merry Christmas Santa die and cut in red cardstock.


http://www.scrappingcottage.com/search.aspx?find=deer+%26+forest+border

http://www.scrappingcottage.com/search.aspx?find=merry+christmas+santa

 Well, that's it for me for this wee. I want to take an opportunity to wish all of you a very, Merry Christmas. Thanks for all the support and comments you have all left this past year. See you next week.


Saturday, November 12, 2016

Northern Lights Background Technique

(click photo to view larger)
Hello Scrapping Cottage friends! Thanks for taking the time to stop and visit today. It's Mary Marsh here bringing you the Saturday edition of the Blog. Another weekend is upon us and that brings us closer to Christmas. Today I noticed out in Blogland that someone mentioned it being 6 weeks to Christmas. Yikes! Time to get busy and get all my cards finished.

Today, I am using a couple of the dies from the Christmas Part 1 & 2 releases. It's the horse w/ sleigh and the deer and forest border dies. I also tried a technique that I hadn't done before called the Northern Lights technique. I really liked how the background turned out and it's so easy to do. Let's get started with the details of my card.

Purple Card Base: 5 1/2" x 4 1/4"
Cucumber Green Layer: 5 1/4" x 4"
Image Panel: 5 1/8" x 3 7/8"

Step 1: Started by selecting the 5 colors I wanted to use for my background sponging. There is a lot of sponging with this technique and each time you try it the card will turn out just a bit different.
Step 2: I decided to start with the yellow ink first. I made a couple of paths of color using a stamping sponge. The yellow really added some brightness to this background. 
 
Step 3:  I laid down my 2nd ink color using the medium blue ink. Just kind of followed the path of the yellow ink.
Step 4:  Added my 3rd ink color with the rich purple shade. This is really a vibrant ink color and the reason I chose it for my card. With each addition of ink I used a different sponge.
Step 5: On this step I added the medium green ink and again I used a clean stamping sponge. I layered it in all the remaining white areas of my card.
Step 6:  On this final inking step I added the navy blue ink. This is how it turns into a sky. Using my stamping sponge I went in between the 2 colors to break up the line and to kind of mute the colors. You can make your sky as dark as you want it.
 
If it gets too dark you can go back in and add some more of the other colors to brighten it up. I actually turned this base to make my card a landscape design. So I did go back in and add more of the navy after I took this photo. You can see in my finished photo that I did darken it up a bit.
Step 7: I cut my images in black to make them like a silhouette against the northern lights night time sky. The snow bank is a silver cardstock topped with chunky glitter for a glistening snow. My sentiment is stamped in Versamark ink and then I used a black embossing powder to make it bold and stand out.  
 
Step 8:  I am now ready to assemble my card. After it was put together, I decided to add some stars in the same colors I used for my ink. I cut the single stars from the Merry Christmas Ribbon die and scattered them across the sky.
If you want to look at a larger view of any of the pictures, just click on it and it will open up larger.
 
 Well, that's it for me for this week. I hope my card has inspired you to give this technique a try. So until next time........inky hugs!
 
http://www.scrappingcottage.com/cottagecutzhorsewsleighelites.aspx
 
http://www.scrappingcottage.com/cottagecutzdeerandforestborder.aspx
http://www.scrappingcottage.com/cottagecutzmerrychristmasribbonelites.aspx