Showing posts with label Circle Set. Show all posts

Thursday, October 13, 2022

Halloween Treat Box!

 Hello Scrapping Cottage Friends

We have a brand new release just in time for all of those amazing Halloween cards everyone makes!! The collection has 22 fabulous dies that are going to make those scrapbook layouts and cards look SPOOKTACULAR!!!  The dies are currently on sale so make sure you get them while they last at this special introductory offer!!

Today, I am using the Witchy Ghost.  It sits perfectly on top of the tiny treat box.  I also used the Web and a spider from the Jack-O-Lanter Witch.  I think this cute little box will be perfect for a teacher's gift or some special Trick or Treaters!

Design Steps:

1.  Cut a piece of orange card stock 9 1/4 x 4 1/2 and then score

2.  Horizontal 5/8, 4 3/8,  5,  8 3/4
3.  Vertically 5/8, 3 3/8, 4
4.  Use a bone folder and burnish the score lines then open flat with the two score lines horizontally on the top of your work area
5.  Cut the tabs on the bottom of the orange card stock as shown above
6. Then flip the orange card stock so that the 2 horizontal score lines are now at the bottom of your work area as shown above  

7.  Cut the bottom of the orange card stock to match the picture above 
8. Flip the box over so the double scored longest flap is now at the top of the work space.  The longest flap is the part that will close the box so round those corners
9.  Glue two pieces of DP each measuring 2 1/2 x 3 1/2 to the box as shown above
10.  Cut a notch on the side that does not have the flap that closes the box.  I used the second to the smallest from the Circle dies.  As shown above
11.  On the opposite side of the notch cut you will cut the window of the candy box with the 3rd from the smallest Pierced Retangle dies.  As shown above
12.  Flip the orange piece over and tape the acetate to the back of the window
13.  Assemble the box using glue or a strong double sided tape making sure you do not glue the flap that opens and closes the box

14.  Place the candy in the box.  You can use any kind of candy you wish
15.  Use the Witchy Ghost die, the Web die and the Jack-O-Lantern Witch die (for the spider) to cut out the pieces in the following colors of card stock: white, yellow, orange, purple,  green, gray and black.  Assemble the pieces with a fine tip quick drying glue.  Glue the pieces to the front of the box as shown below then add the sentiment and your little treat box is finished

 CottageCutz Products


Please make sure to check out this amazing Halloween release right HERE!


We have more inspiration on our YouTube Channel check it out HERE

Thanks so much for stopping by!  And I will see you next Thursday.

Blessings and Take Care


Saturday, May 28, 2022

Fountain Sundae - Double Easel Fold

Hello CottageCutz friends! Thanks for taking the time to stop and visit with us today. It's Mary Marsh here bringing you the Sunday edition of the Blog.

It's new release time!!! We have new dies in the online store. It's our Sweet Treats release with 13 new designs. They are so perfect for any card making occasion you may have. The individual dies are currently 30% off.

We are also having a big Memorial Day sale with savings of up to 70% off. Check the online store

Today for your viewing pleasure, I have created a birthday fun fold card. This fold is called a double easel fold. I am using the new Fountain Sundae die for my card. This is a birthday card for a friend, so I decided to add a "gift card" holder. I am giving her a gift card to a local ice cream parlor. They make the most delicious SundaesSo, let's get started with some details of how I made this card.

Design Steps:

Since I knew the fold I was going to use for my card, I picked my designer papers and coordinating cardstock. I found this fun and festive paper that I thought was perfect for a birthday card.  The ice cream cone paper was a perfect addition to my fun fold. 

The card base is 4 1/4" x 11" and I scored it at 2 3/4" then at 5 1/2". The cardstock color is a rich blackberry shade. I am using designer paper that is the same color. 
You fold it in half at the 5 1/2" score- this makes a valley. Then fold the 2 3/4" score back- to make a mountain. See photo below
You fold it in half at the 5 1/2" score- this makes a valley fold. Then fold the 2 3/4" score back- to make a mountain fold.  I used ombre designer paper in the blackberry color. Cut it at 4" x 2 1/2". All attached with double sided tape. 
Next, I cut a piece of the blackberry cardstock at 3 1/2" x 9" and scored at 4 1/2". This is the card front and attaches to the back panel and over the ice cream paper. 
I used another ombre designer paper on this panel measuring 3 1/3" x 4 1/4". Then attached to the card base with double sided tape. 
 For this panel on the inside, I used more designer paper - 3 1/4" x 4 1/4" to create my gift card holder.  I just used a 1 1/2" circle punch to cut a notch to slip the gift card in. I attached with Art Glitter Glue on the bottom and about 3/4 of the way up the sides. 
I cut a piece of white cardstock the same size and stamped my birthday sentiment.  
Attached this panel to the card inside with double sided tape. 
Now for my fountain sundae image. I cut in cardstock that coordinated with the designer paper. I decided to attach it to a circle with dimensional adhesive. I used the 3rd largest Circle die. I stamped my sentiment in coral ink.
Now for the easel "holder". I used the Stitched Circle die and cut in blackberry cardstock. Cut a smaller one with the Circle die and added a heart. To complete my card, I scattered a few sequins.  
Here is more of a side view of this fun fold.
And then what it looks like completely open. I decided to add another piece of the ice cream designer paper.
I hope I have given you a fun idea for a way to use this new die. See you next Saturday!

Reminder: Our YouTube Channel has a new video from Marla Harris. There is a giveaway for being a subscriber, liking the video and leaving a comment. Click here.

Dies I used to create card:


Saturday, December 11, 2021

Angel Ornament


Hello CottageCutz friends! Thanks for taking the time to stop and visit with us today. It's Mary Marsh here bringing you the Saturday edition of the Blog. 

IT'S NEW RELEASE TIME! Our annual Black Friday release is in the store. It's the Campin' Out release with 14 ever so cute designs and they are currently on a 30% off sale. It's perfect for year-round card making. And the Christmas release Part 1 and Part 2 is also available. There is still time to get Christmas dies ordered and delivered for Christmas card making.

Today, for your viewing pleasure I have a Christmas card in non-traditional colors using the Fairy Angel Ornament die. It's from the Christmas Part 1 release. So, let's get started with some details on how I created my card.

Design Steps:

I started my card this week with the colors from the Splitcoaststampers color challenge #873. We were to use blushing bride, mint macaron and crumb cake for our color trio. Optional was to add bling. 
blushing bride, mint macaron, crumb cake
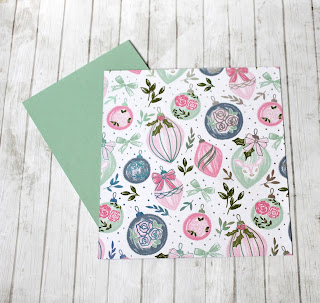
I chose some metallic ornament paper from my stash that had two of the challenge colors. I thought it would a great backdrop for my angel ornament. I love the paper but metallics are not easy for me to capture a good photo. This paper has lots of silver on every ornament, but it doesn't show on the photo. If you have any tips, let me know. 

mint macaron card base: 4 1/4" x 5 1/2"
designer paper layer: 4 1/8" x 5 3/8"
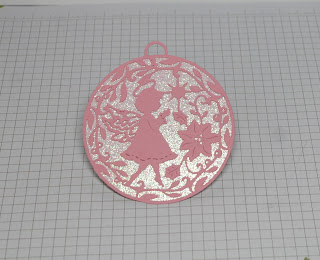
Next, I cut my fairy angel ornament in the pink cardstock and decided to use some white glitter paper for the background. I used the largest die from the Circle set to cut it. 
I had a bit of a struggle trying to figure out how to get the crumb cake color in my design. It doesn't have to be a lot, but it has to be there. So, I found some paper in my stash that had that color in a muted way. 
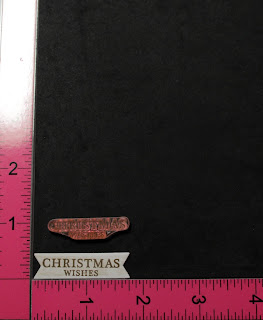
I cut it in a small banner and stamped my sentiment in a medium brown ink. 
Now that all my card elements are prepared, I am ready to start card assembly. I attached the designer paper to the card base with double sided tape. 

I attached the angel ornament to the glitter paper with Art Glitter glue. It dries clear and hold securely. 
I used silver cord as the ornament "hanger" and also added a silver cord bow for interest. The ornament is attached with double sided tape.

To finish off my card, I attached the sentiment banner with double sided tape and scattered some mint faceted enamel dots for the bling option. And that's my sample for this week. I hope I have given you an idea for the angel ornament die. See you next Saturday!


dies I used to create card: