Showing posts with label Woodland Mailbox. Show all posts

Tuesday, December 20, 2016

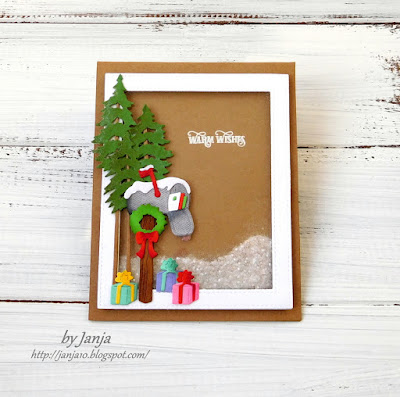
Shaker card with mailbox

Hi, Janja here!

Christmas time is almost here. In Slovenia we don't have any snow yet, and the weather forecast is not promising us a white Christmas. Never mind, today I will take care of snow :).


For the card we need:
- CottageCutz dies: woodland mailbox, forest trees, stitched wide rectangle frame set (the largest die from set)
- kraft card base: 4.1 x 5.3" (10,5 x 13,5 cm), folded
- white and colored cardstock
- glitter
- white embossing powder
- Distress ink: Worn Lipstick, Festive Berries, Vintage Photo, Mowed Lawn, Peeled Paint, Black Soot

Prepare a card base from kraft cardstock. Cut out a frame from white cardstock with a frame die and a sheet of transparent foil in the frame size.


Coat the frame with glue and sprinkle it with glitter.


On kraft base stamp "Warm Wishes" and treat it with hot embossing technique. Use white powder.
Glue transparent foil to the back of the frame, and fasten across it self-adhesive foam tape. Finally, add snowflakes and attach the base card to the frame.


From colored cardstock cut out all the elements for the mailbox and spruces. Shadow them with Distress inks.


To finish the card, fix mailbox with gifts and spruces as shown using foam adhesive pads.


Another view to the snow-covered card, after we shake it.


I wish you a Merry Christmas.

Thank you for coming over and see you next Tuesday.


Thursday, October 20, 2016

Woodland Mailbox


Hi, Vladka is here!

Today I have another Christmas card for you with this cute Holiday scene. Let me show you how I created this card.


Basics:

White card base: 5 1/2 x 5 1/2 inches (cut 5 1/2 x 11 inches, fold in half)
Additional piece of white cardstock and some white and red cardstock to cut out the die cuts

Other Supplies:

CottageCutz Dies: Listed Below
Distress Ink: Fired Brick, Peeled Paint, Brushed Corduroy, Blueprint Sketch
Other: Scissors, Paper trimmer, Sizzix machine, Scor-buddy, White watercolor in tube, paint brush


1. With the Woodland Mailbox cut all pieces out of white cardstock and. Color them with distress inks and if you want, distress edges with darker shades of distress inks. Then glue all pieces together.


2. Apply some Tumbled Glass and Blueprint Sketch distress ink on the acrylic block and add also some water. Mixed with the paint brush. Use large paint brush and apply color on the additional piece of paper. Let it dry or use heat gun to speed the process.


2. Mix some white watercolor or acrylic paint with water and use thin paint brush to flick some droplets of the mixture on the previous colored surface. Let it dry.


This is is for today. Have a nice day. And don't forget, seventh CottageCutz challenge is waiting for you. This time theme is FALL. You can linked your project here. And please, use only Scrapping Cottage dies.

Friday, September 09, 2016

Seasons Greetings with Non-Traditional Colors

Hello Scrapping Cottage friends! Thanks for taking the time to stop and visit today. It's Mary Marsh here bringing you the Friday edition of the Blog.
 
We are still having crazy hot and humid weather here in the Eastern part of the U.S. So thinking about snow, ice and Christmas right now seems strange especially when I am harvesting lots of tomatoes, zucchini, basil and peppers (lol)!!!  
 
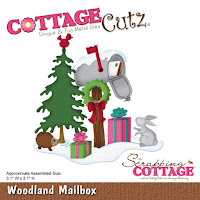
But, the Christmas dies are in the online store and I know you all are looking for ideas and ways to use those dies. So here I am with some inspiration using the Woodland Mailbox die set. This set comes with the mailbox, pine tree, wreath, presents, bunny, hedgehog, bird, snowbank and even letters for the mailbox. It is a super cute set. 
 
You could die cut with white cardstock and then color the images the way you want. Or you could do as  I did and die cut with different colored cardstock. It's your preference and either way it would make for a cute card.
 
I like to make Christmas cards using non-traditional colors as well. On this one I used a soft pink, a soft blue and a wasabi shade of green. So let's get started with some details on how I created this card.
 
Wasabi Green card base: 5 1/2" x 4 1/4"
White image panel:  5 1/8" x 3 7/8"
 
I started this card by sponging my background panel with a soft sky blue and a soft pink shade. I was trying to achieve a soft subtle background for the die images. I used a sponge and a sponge dauber on this background.
 
Once the background I was finished I die cut all my images and adhered them to the card with a combination of glue dots and Ranger multi matte medium. I stamped my sentiment and scattered a few sequins for some additional background interest and that completed my card.
Here is a close-up shot of the dies. I also used some white glitter paper for my snowbank and mailbox snow. Look at the cute little hedgie and also the letters in the mailbox. The white one even has a stamp on it- so cute.
Well my friends, that's my post for this week. I hope my card has given you some ideas of ways to use this new die set.
Just a reminder that our 6th challenge is going on with a Holiday theme this time around. Get info here.
Until next time.......inky hugs!!!
 
http://www.scrappingcottage.com/cottagecutzwoodlandmailbox.aspx