Showing posts with label Tea Time Doily. Show all posts

Thursday, February 16, 2023

Thank You Flowers

Hello Friends

It is Pam sharing with you today!

IT'S NEW RELEASE TIME!  The collection is called Flowers and More.   The unique thing about this release is that there are fewer pieces in each of the dies.  So they go together really quickly and easily! 

I noticed I was getting low on Thank you cards. So I decided the flowers in this release are so pretty they would make a beautiful thank you! I used Flower 5 and Leafy Branches 12 and 3.  My inspiration for this card was one by Barbara Anders that I found on Pinterest.

Designer Steps:

1.  Using an A2 white card base splatter the card with black.  I used a watered down black acrylic paint
2.  Cut out a white doily with the Tea Time Doily then splatter it with the same black mixture as the card base


3.  Use a black striped washi tape to line each side of the card

4.   Using the following dies Leafy Branch 12, and 3 cut out the leaves in 2 different shades of green card stock.  Using the Flower 5 cut out the large and small flower in 3 shades of blue card stock.  Using the Garden Wheelbarrow cut out 6 of the small white flowers
5.  I cut a slit in the blue flowers between the petals and then cupped then with a stylus.  After I cupped them I pinched the petals to give them a little shape.  I also did this with the white flowers only on the small white flowers I glued 2 together for a little more strength
6.  For the centers I used white Prills which I dyed yellow with some distress ink

7.  Cut two Thanks in black using the Thanks Expression die.  Glue the two Thanks toghether.  Glue the doily slightly to the right of center as shown above and then glue down the Thanks as shown

8.  Arrange the blue flowers and glue dot then down.  Tuck the leaves in and around the flowers.  Then add the small white flowers and your card is complete

CottageCutz Supplies


We have more inspiration on our YouTube Channel check it out HERE

Thanks so much for stopping by!  And I will see you next Thursday.

Blessings and Take Care


Tuesday, October 02, 2018

Jolly Santa Claus

Hi, Janja here!

Today I'm sharing with you my new card with Jolly Santa Claus.


Supplies:
- Cottagecutz dies: Jolly Santa Claus, Tea time Doily
- white card base: 5.3 x 5.3" (13,5 x 13,5 cm), folded
- patterned paper: 5 x 5" (12,7 x 12,7 cm)
- patterned paper: 3.94 x 3.94" (10 x 10 cm)
- white and colored cardstock
- colored ink pads
- glue, double-sided adhesive tape, self-adhesive foam pads

Die cut all the pieces for jolly Santa Claus. Ink the edges, and attach all pieces to each other.


Prepare a white card base. Cut square, and two strips of patterned paper. Paste both on a white cardstock.

Cut two smaller squares from white and patterned paper. Cut a round lace from a white cardstock. With a scissor cut it in half.


Attach all layers as shown.


Now stamp a sentiment. Attach Santa Claus with self-adhesive pads on the background.
And we're at the end.


I would like to remind you that the new Christmas dies (Part 3) and the new Halloween dies are already in the store. They are currently on sale for 25% off.
Thanks for stopping by. Have a lovely day.


Tuesday, May 23, 2017

Sweet dreams

Hi, Janja here!

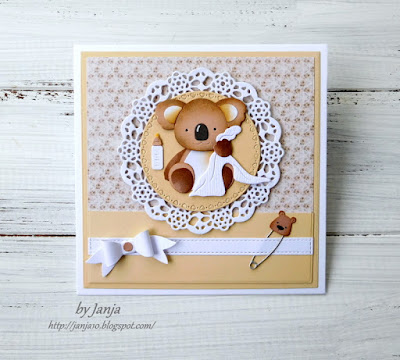
I have a lovely baby koala card, for you today. My card was made by using dies from the Baby release and the new Expressions plus release.


Supplies:
- CottageCutz dies: Baby Koala w/Blanket, Baby Diaper Pins, Baby Booties mini, Diaper mini, Sweet Phrase, Dream Phrase, Sweetheart Doilies, Tea Time Doily, Build-a-Bow, Stitched Wide Rectangle Frame Set, Stitched Wide Circle Drame Set, Circle Set
- white card base: 5.3 x 5.3" (13,5 x 13,5 cm), folded
- yellow cardstock: 5 x 5" (12,7 x 12,7 cm) and 4.76 x 1.57" (12,1 x 4 cm)
- patterned paper: 4.76 x 4.76" (12,1 x 12,1 cm)
- white and colored cardstock
- glue, double-sided adhesive tape, white fun foam

Koala's coat is in shades of ashen-gray, sometimes also in red-brown color. I gave it a brown color, combined with yellow background.
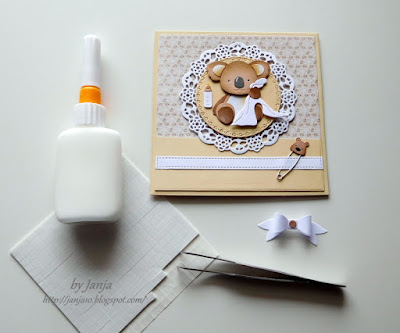
Cut out all the elements of baby koala and assemble them into a whole.


Find a patterned paper that you like, and choose a coordinating color of cardstock. Trim them to the appropriate size.


For the remaining elements use a white cardstock.


To keep the small hearts in openings, attach the self-adhesive foil on the backside. Glue both round cutouts, and add a circle from fun foam. If you prefer use self-adhesive foam tape.

Now it's time to assemble the card. 


Mount all the elements as shown on white card base. Use glue and self-adhesive foam pads.


For special occasions such as birth, it is nice to see a card that has also decorated the interior.


I added the small letter S at the end. I cut it out from the thanks phrase.
Attach a bow when the card is completed. 


Janet, our video artist has created a video showcasing some of the new Expressions Phrases. 


Have a lovely day!