Showing posts with label Cottage Cutz Stitched Rectangle. Show all posts

Saturday, August 05, 2023

Thank You Card


Hello CottageCutz friends! Thanks for taking the time to stop and visit with us today. It's Mary Marsh here bringing you the Saturday edition of the Blog.

Our new Folk Art release is still available in the online store at 35% off individual dies. There are 19 new designs that are so perfect for cardmaking, journaling, and scrapbooking.

They allow you to add a beautiful touch of folk art to whatever you may be creating - birthday, thank-you, new home, thinking of you and even Christmas. The design team has featured many creative ideas using these dies so take a look back at our posts for inspiration.

For my card today I am doing a throwback to some older dies from a 2018 release. I used the Stitched Jars & Stitched Fruit dies to create a thank you card. My neighbor always sends us a jar of her homemade pear butter each year and I want to be prepared with a thank you card. The pears are on her tree now and will be ripe in a few weeks. 

Design Steps:
I started my card with an old sketch I had saved on my computer. 
 I looked through my designer paper to see if I had any pear themed paper. I found this one that I have had for years and thought it would work for my card layout. 

Chocolate Chip Card Base: 4 1/4" x 5 1/2"
Curry Layer: 4" x 5 1/4"
Designer Paper Layer: 3 7/8" x 5 1/8"
Next, I cut the jar and pear. I used vellum for the jar and a metallic silver for the jar lid. The pear is cut in olive card stock. 
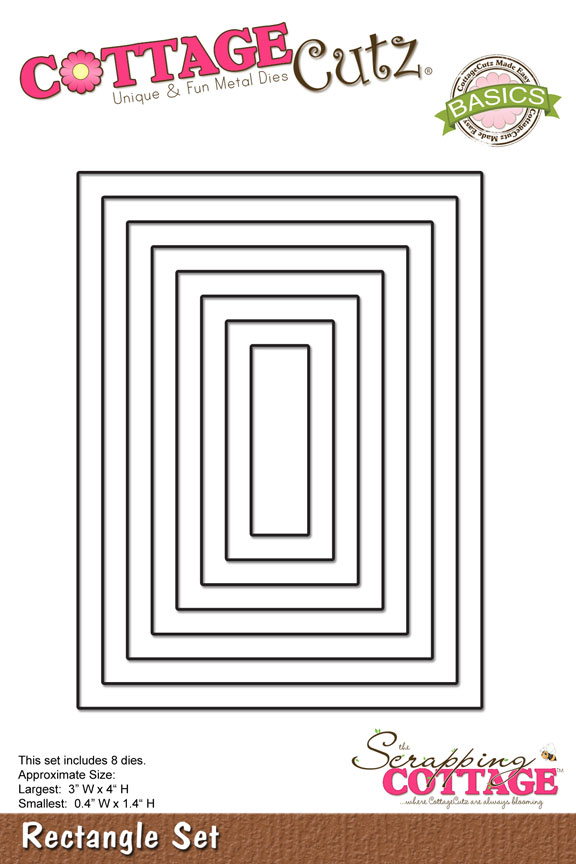
For the rectangle panels on the sketch, I used the Stitched Rectangle Set on the choc chip panel.  It's the 3rd largest die (2 7/8" x 3 7/8"). The curry panel is cut from the Rectangle Set. I used the 2nd largest die (2 5/8" x 3 5/8"). 
I used the Thanks w/Shadow die for my sentiment. The shadow is cut in choc chip and the thanks phrase in olive. 
My elements are all cut. I am ready to start assembly. I attached the card base and both layering panels w/double sided tape.
For the image panel I attached the jar w/clear glue- adding it behind the lid and where I was placing the pear image. The pear image is lifted slightly off the jar with dimensional adhesive. I used a border die cut in chocolate chip and added white pearls for interest.  I also added some chocolate chip ribbon. 
To finish off my card I attached the Thanks phrase with glue dots and scattered a few more pearls. 
Well, that's it for me for this post. See you next Saturday.

Reminder: Marla has a video up on the CottageCutz YouTube channel. She has a giveaway. Click here. 


Tuesday, December 20, 2022

Easy Snowman Tag

Happy Tuesday Cottage Cutz Friends!
Melinda here with you, and today I am sharing a very easy tag for a present I created with the adorable Snowman w/Tree Die from  from this year's amazing Christmas release! As we get down to the wire and finish wrapping all of those presents, here is a very quick and easy tag solution that you can get done fairly quickly!
To create my cute and very simple tag, I used the second largest double stitched rectangle die from that set for my base. I cut it out of plain white cardstock. I then proceeded to cut a piece of patterned paper for the background mat. 

I then cut out the adorable snowman die in white cardstock. I colored the various pieces with my markers. and assembled them and put them onto the mat. I added some puff paint for the snow, the brim of the hat and the ball. I also added some of that same paint onto the tree too.

Next, I cut out the Merry and Christmas from the Tree die set. I colored in the pieces with my pink markers. 


Lastly, I took the second smallest stitched scalloped rectangle from the die set to make my to and from tag. I stuck all of that onto the double stitched mat. To finish off my gift, I wrapped the center in some pretty ribbon. I adhered the finished tag over the ribbon. I hand wrote the To and From on the tag. For a little extra touch,  I added a cute snow flake charm to the corner.

Here's a closer look at my finished tag. I think it turned out super cute and really makes my package look finished!


Dies I Used


Snowman w/Tree


Nested Scallop Rectangle Set


Double Stitched Rectangle Set


Merry Christmas Tree


Here's a look at the entire release. Be sure to head over and grab them while they last!

Well that about covers it for today! Until the next time, have a wonderfully craft-die day!
Melinda Beltran


Saturday, October 08, 2022

Cute Halloween

Hello CottageCutz friends! Thanks for taking the time to stop and visit with us today. It's Mary Marsh here bringing you the Saturday edition of the Blog.

It's new release time!!! We have new dies in the online store. Our Christmas Part 2 release with 36 new designs is available and ready for shipment. There are 3 different bundles you can pick up at 50% off retail.  It's only for a limited time so don't delay.  The individual dies are on sale for 30% off. You are going to love all the whimsical designs that are available in this release. There is something for everyone. 

And we still have the Halloween release with 22 new designs. They are on a 30% off sale as well. So many fun and spooky designs that are perfect for your Halloween card-making. 

For today's card I am featuring the Spooky Kitties & Cute Witchy dies but just using the smiling pumpkins.  I wanted to make a simpler card that would be easy to make multiples of and isn't scary. Maybe you want to send a card to school with your child with a treat attached. Or maybe you're a teacher and you want to give a card to your students. Or you send out cards to your family or neighbors. There are lots of possibilities here. 

Design Steps:

I started by selecting my papers from a cute Halloween collection I had from last year. I thought the dotted designer paper would just add to the fun of the card. I paired it with the bright colors that are in the designer paper.  

Light purple card base: 4 1/4" x 5 1/2"
Pumpkin layering panel: 4 1/8" x 5 3/8"
Designer paper panel: 4" x 5 1/4"
Image Panel: purple layer - Stitched Rectangle die (2nd largest - 2 7/8" x 3 7/8") 
White Layer: 2nd largest Rectangle die (2 3/4" x 3 3/4") 
Next, I cut the pumpkin images with orange & black cardstock. 
I stamped my sentiment in a grape ink with the help of my MISTI. It did require a 2nd inking. The sentiment had some other words on it that I didn't want to use so I just masked them off and inked the part that I did want. 
Now that all my elements are prepared, I am ready to start card assembly. I attached the pumpkins to the image panel. I added my smile phrase using the Smile w/Shadow die.  
This panel was added to the card base with double sided tape. I wanted to add some ribbon to my card but since this is going out in the mail, I knew that would make it a bit bulky. So I added a 3/8" strip of purple cardstock across the panel and then cut the bow from the Halloween Wreath die. 
To finish off the card, I added a few pumpkin-colored enamel dots. 
Well, that's it for me for this week. Make sure you visit again tomorrow; we are having Part 2 of the DT group post. The team has created some great samples.

Reminder:  Our YouTube Channel has a new video featuring a princess card using the Halloween dies from Linh Van. There is a giveaway for being a subscriber, liking the video and leaving a comment. Click here.

Dies used to create card:


Friday, September 09, 2022

Merry Christmas Tree

Hello CottageCutz friends! Thanks for taking the time to stop and visit with us today. It's Mary Marsh here bringing you the Friday edition of the Blog.

It's new release time!!! We have new dies in the online store. It's time for our Christmas release and we have 21 new designs for Christmas Part 1. They are currently on sale for 30% off retail.

There is a great selection of religious, whimsical and some super cute birds and animals. All of your Christmas card making ideas are covered in this release. Today for your viewing pleasure, I am using the new Merry Christmas Tree die. So let's get started with the details of how I created this card. 

Design Steps:

Since I knew what die I wanted to use this week, I just needed a layout to show it off well. I checked out some sketches online and then found this one from Splitcoaststampers SC922.  I thought it would work perfectly and allow me to use designer paper to take the card up a notch. 
Now that I had my layout, I looked for a designer paper. I found a pattern that's from a 2018 collection that I liked. It has copper accents, so I used a brushed copper cardstock as an accent layer.  I attached it then remembered I forgot to take a photo (LOL). The card base is a rich wine shade- it's named merlot.  

Merlot Card Base: 4 1/2" x 5 3/4"
Brushed Copper Layer: 4 1/4" x 5 1/2"
Designer Paper: 4 1/8" x 5 3/8"
I cut the tree image in a blue-green cardstock paper and the Merry Christmas phrase in a rich wine shade both coordinate with the designer paper. Used the largest (3 1/4" x 4 1/4") Stitched Rectangle die cut in a sand cardstock as the frame for the tree image. 
Now for the element of the sketch with the horizontal lines, I decided not to cut the designer paper into strips. Instead, I cut 1/4" strips of the copper brushed cardstock and used those to divide the designer paper. Sketches are open to your interpretation, as long as you keep the layout looking similar.  
Next, I attached the tree to the rectangle image panel with dimensional adhesive. Then the rectangle panel to the designer paper layer also using dimensional adhesive. This adhesive was just a bit thinner to give a slight lift from the designer paper.  I also cut new stars for the tree image in copper brushed cardstock. The photo above shows them in gold. Added a few enamel dots to the image panel just for interest. 

To complete my card, I attached the panels to the card base with double sided adhesive. That's it for me for this post. I hope I have given you an idea for a way to use this new die. See you next week. 
Reminder: Our YouTube Channel has a new video from Linh Van. There is a giveaway for being a subscriber, liking the video and leaving a comment. Click here.

Die I used to create card:


Saturday, September 03, 2022

Ho Ho Hoooot Holiday!

Hello CottageCutz friends! Thanks for taking the time to stop and visit with us today. It's Mary Marsh here bringing you the Saturday edition of the Blog.

It's new release time!!! We have new dies in the online store. It's time for our Christmas release and we have 21 new designs for Christmas Part 1. You can pick up the entire bundle at a 50% off retail. It's just for a limited time so don't delay. You can also get the individual dies for 30% off retail.

There is a great selection of religious, whimsical and some super cute birds and animals. All of your Christmas card making ideas are covered in this release. Today for your viewing pleasure, I am using the new Christmas Owls die. I have a friend who loves owls so this one will go to her for Christmas. So, let's get started on some details of how I created this card. 

Design Steps:
Since I knew the die I was going to use, I looked for a Christmas themed designer paper in my collection. I found one with snowflakes and gold accents. I thought it would work perfectly. 

Green Card Base: 4 1/4" x 5 1/2" 
Designer Paper Layer: 5 1/4" x 5 3/8"
White Image Panel: 2nd largest Stitched Rectangle (2 7/8" x 3 7/8") die 
Next, I cut the owl images in different shades of cardstock. The Merry Christmas phrase is from a 2018 Christmas release - Merry Christmas w/Deer Family. It's part of the Labor Day sale and is 50% off
For added interest on the image panel I used a swirling snow embossing folder. The sentiment is stamped in red ink.  
Now that my card elements are prepared, I am ready to start card assembly. I attached the designer paper and the image to the card base with double sided tape.
Next, I attached the owl images with clear drying glue. 
To finish off my card, I added the Merry Christmas phrase.  And I have a Christmas card finished with the new dies of the season. That's it for me for this week.
We are having a huge Labor Day sale with savings of up to 65%. It runs through Thursday, September 8. Shop early for some great buys on dies that may be on your wish list. 

Reminder: Our YouTube Channel has a new video from Jen Hartsgrove. There is a giveaway for being a subscriber, liking the video and leaving a comment. Click here.