Showing posts with label Blossom Branch. Show all posts

Saturday, July 23, 2016

BIRDBATH AND MORE

Hello dear friends !!!!

Happy Saturday to you !!! Are you all geared up to enjoy the weekend !!! I hope you have some plans for crafting also. I have set aside a few hours for making cards !!! I would like you all to have a look at all the CottageCutz dies , especially the new releases. They are simply fabulous.

Today, I am sharing a very simple yet elegant card with you. I have always been fascinated with bird baths and so when I saw this die , I was so happy.

So here is my card.


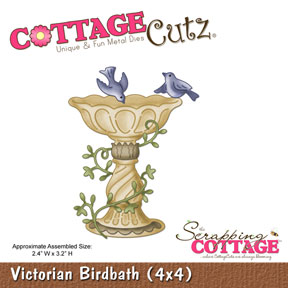
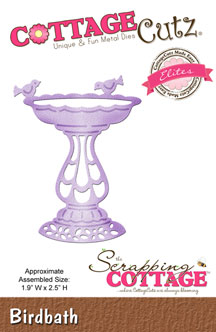
 I combined two die cuts CottageCutz die Victorian bird bath and Bird Bath together. This gave me more birds on my birdbath. I have distressed the die cut a little with Distress ink Worn Lipstick.

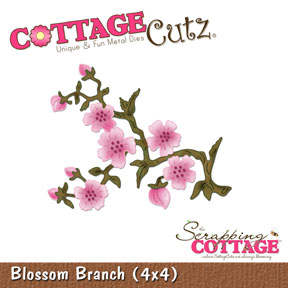
This is another close which shows how I have used the CottageCutz Blossom Branch. I have cut the leaves from the branch and distressed them with Peeled Paint distress ink and arranged with the flowers.


The backdrop is the Swirl embossing folder on white card stock cut to the size 4 inches by 5 inches.
Then I used CottageCutz  Wide Rectangle Stitched Frame and on top of that I attached the CottageCutz Stitched Oval frame set as shown in the picture.


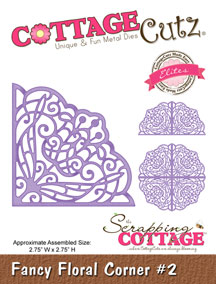
For the filigree background, cut four CottageCutz Fancy Floral #2 die in white card stock, and arrange at the four corners of the frame.
Place the whole thing on a pattern paper measuring 5 inches by 7 inches. Adhere on green card stock folded to form the complete card that measures 7.5 inches by 5.5 inches. Add a die cut from stash for sentiment. Add a bow on the left side.


The finished card.


The CottageCutz challenge 4 is going on at the blog. So do share your entries to win awesome prizes.


Saturday, May 14, 2016

MIXED MEDIA WITH COTTAGECUTZ

HELLO !!!!

Its Saturday again and time for my new post !!!! I hope you will like this post as much as I enjoyed writing it.
Have you always thought that die cuts are usually for card making or scrapbooking. But after this post , you will change your opinion, for today I have for you-A Mixed Media Canvas with CottaageCutz dies. YES!!! you got me right !!!
CottageCutz has some most amazing dies that can used in mixed media to create beautiful backgrounds.
I have made a video tutorial on the making of my mixed media canvas. Do go through it to get detailed description of the project.
Here is the video tutorial.


Photographs of the project


CottageCutz dies used


Other products used

An 8x8 inch wooden board, Modelling paste , white gesso, White sand Texture Paste, Distress inks, Distress Sprays, Stamps, Black Ink, Glossy Accents, Distress Glitter, Stencils, Multi Medium Gel


I hope you liked  the project. We are having a brand new Challenge at the CottageCutz blog and the theme is Hello Spring. So do take part in it to win fabulous prizes.

Keep crafting and thanks for stopping by.


Friday, March 28, 2014

Blossom Branch

Hi all. Vladka here! 
I have another spring card for you. Trees are so beautiful with all blossoms at this time of the year. I tried to imitate this with beautiful Blossom Branch die. 
To add some dimension, I cut out the bigger circle from white cardstock and smaller one from green cardstock which is used also as decorative edge. After long time I also added some stitches. I hope you like it. 
Blossoming weekend to all! 

Tuesday, May 14, 2013

Butterflies

We have some SAD news to share with you today. Today is Cindy's Last post with us here at CottageCutz. We will Greatly miss her Beautiful Creations!!! Cindy we have enjoyed having you as a part of the CottageCutz Design Team hun! Best of luck to you !!!

Hi everyone Cindy here with a SWEET CottageCutz Design, I have used CottageCutz Spring Butterfly Notecard , this card die is so easy and PRETTY to use, I just love it. 


CottageCutz Blossom Branch


Hugs Cindy xoxo

Thursday, May 02, 2013

Garden Hello Wall Hanging


Hi everyone!  Kathy here and today I have a wall hanging to share with you!


I used lots of beatiful CottageCutz Dies and Secret Garden Designer Papers from Graphic 45 to make this. The base is a page from a 8" x 8" scalloped chipboard album I got at Michaels. I covered it with an off-white designer paper (dp) that has crack lines on it and added a piece of peach dp to look like the side of a house. The outside border is a piece of the designer paper that I trimmed out the center of leaving just the border. Under the top of the border, I placed a piece of striped dp that was punched with a scalloped border on it. Under the bottom of the border, I added a picket fence using the Picket Fence Border Die and peach dp. I inked the edges a little and placed green dp under it.

All these pieces were glued together and added to the chipboard with Mod Podge. After letting it dry well, I trimmed the out side edge of the paper to match the scallop on the chipboard. (Note: Next time I do, this I will trace the chipboard shape on the back of the dp with pencil and trim it before adhering to the chipboard!)

The Garden Bird Branch was cut with the green dp and the 2 birds in it were cut with the peach and glued in place.

For the branch along the fence, I used the Bluebird Die with green dp, shaped it and tucked it in in the fence a little. The flowers on the 2 branches are from the Blossom Branch Die that I cut using peach dp and Solar White. I shaped these with my tool kit and mat and inked them.

For the window, I used the Springtime Window Die and cut it with green dp. The image in the window is a piece from the dp that I trimed to fit. I added the birdcage in peach dp and 2 birds all from the Birdcage & Stand Die. On the bottom of the window I added a piece of lace and mini pompom trim (a sample from Really Reasonable Ribbon) with Scor-tape.

Here's a little close up for you.


The little flower pots are from the Springtime Window Die that I cut with the green and peach dp and some Solar White and terra cotta color papers I had in my scraps folder.

For finishing touches, I added liquid pearls to flower centers, added twine bows and adhesive pearls. The chipboard tag, from Secret Garden, was added to the bottom with a tiny piece of the Moss Ribbon. Moss Ribbon was added to the back to use as a hanger and them covered with paper to finish.

Here are the dies I used on my project.


Saturday, March 02, 2013

Birdie in Blossoms


Hi there!

It's Kathy here with you and today I have a Birdie in Blossoms Card to show you using three CottageCutz Dies.


I used the bird from the Bluebird Die, the flowers and branch from the Blossom Branch Die, and the frame from the Oval Doily & Frame Die.

I used a piece of designer paper (Secret Garden - Graphic 45) with a pretty bird and flower image and enhanced it with the dies matching the colors. The bird from the Bluebird Die, was cut with white paper and colored with Aegean Blue Chalk Ink and Vintage Photo Distress Ink. The beak and feet were inked with Red Brick Chalk Ink. The Blossom Branch was cut with peach cardstock for the flowers and green for the branch.  The flowers were shaped with a mat and tool kit, inked with Red BrickChalk Ink, and dotted with Buttercup Liquid Pearls in the center. The branch was cut to piece around the lower corner of the image.  The frame from the Oval Doily & Frame was cut with Natural White Cardstock.

I added a bow made with Natural Jute String from Really Reasonable Ribbon and the Bow-Maker. I didn't add a sentiment to this, but a small, short sentiment would be cute on the bottom right or as a tag hanging from the bow.

Here are pictures of the dies I used on this.


I hope this gives you a little inspiration!

Thursday, February 21, 2013

Wedding Chapel


Happy Thursday everyone!

Kathy with you today!  For my project, I have a center step card I made using two of CottageCutz's Dies, Wedding Chapel and Blossom Branch.   I just love these dies, they are so much fun to work with!


I cut out all the pieces with white cardstock and colored them with inks using sponges and make-up applicators. Some of the pieces were shaped a little with a molding mat and stylus. Here's a close-up of the die pieces. I love how the flowers came out with the blue ink and liquid pearls.


These are the CottageCutz Dies that I used.


I hope you like my project and it give you a little inspiration for using these dies!


Wednesday, December 14, 2011

Quick but Beautiful Last Minute Gift


Are you needing a small little handmade gift for a teacher, hostess or friend?  I have an easy gift that really doesn't take long at all to make but is so useful.  A tissue box holder.  You can pick up wooden tissue box covers at your local craft store for just a couple dollars and then the creative fun begins. 


You can cover the box with just one sheet of designer paper...granted I used two but I just wanted the mixed up patterns.  Then just add a few die cuts and and your done.  Of course you can go more detailed if you want, but I figured I didn't want to much going on as you needed to be able to get to the tissue.


I used the beautiful Blossom Branch die.  I did ink up the center and some of the edges with a little distress ink and then cupped the flowers with my McGill paper tool to lift them up.  Easy Peasy...glued them down with some strong glue and topped them off with "of course" pearls.  I do love me some pearls, LOL. 

Have a great rest of the week and happy crafting.